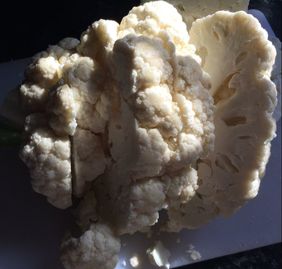
 I really love pasta and love finding creative ways to make different sauces to change up the flavor. Cauliflower Alfredo is one of my favorites. There are a few variations out there, but not all of them are MS approved, i.e. make sure to avoid vegan butter at all costs. Pasta is one thing that I do buy that is processed (I have not gone down the lane of making my own pasta...yet ;)), but I make sure to buy whole wheat or whole grain. Gluten-free can also be substituted, I am not such a fan of corn based gluten-free pasta because it tastes too much like corn tortillas to me. This sauce is also great with cooked quinoa or brown rice. Cauliflower Alfredo is a great way to make sure you are getting your cruciferous vegetable in for the day. You can click here to find the original recipe that inspired the following: 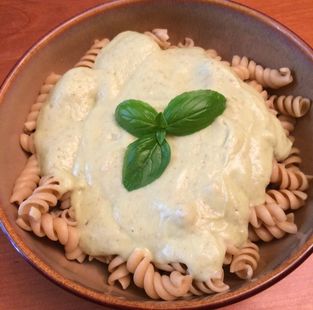 Cauliflower Alfredo Recipe
vegan, plant-based, refined sugar-free Ingredients:
Instructions:
Notes: *I really like adding the nutritional yeast to this, but it also works without it. * Blending a 1:1 ratio of raw nuts and water makes a very nice 'cream' that can be added to any sauce to give it a creamy consistency and flavor.
0 Comments
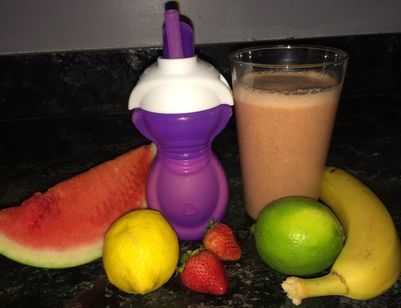
 This smoothie is great for summer. Especially at those times when your refrigerator is being overtaken by watermelon and you are looking for an alternative way to prepare it. The original recipe can be found here, I tweaked it a bit below. This recipe is also a big hit with my 4 year old. Watermelon Smoothie Recipe vegan, gluten-free, plant-based, refined sugar-free Ingredients:
Instructions:
|
AuthorAmanda Windhof, PhD is an MS lifestyle advocate who wants to ensure a healthy diet is accessible to everyone. Archives
July 2024
Categories |

 RSS Feed